Integration with ClickFunnels
Need to send WhatsApp messages to your customers after they have purchased a product on your website? This article will explain how to use the setup ClickFunnels Webhook Triggers.
Prior to getting started, you will need to have the following:
-
Login Access to ClickFunnels Classic Version
-
Created Products in the Order Form Step within the Funnel
Step 1: Create a Trigger
1.1 Setup a Trigger
Login to WAContact, then navigate to the Integration page from the top menu. Click on the Setup Now button in the ClickFunnels card.
Click on the Add Trigger button

Add a name to your trigger. For example: Purchase Created.

1.2 Select Events
You can select any event from the list of available events. Later we can define the action to be executed when the event you have selected occurs. For example, if you want to send a text message when a purchase is created, you can select purchase_created here.
First click on the drop down and change it to Selected events.

Then you can choose the event you like to add
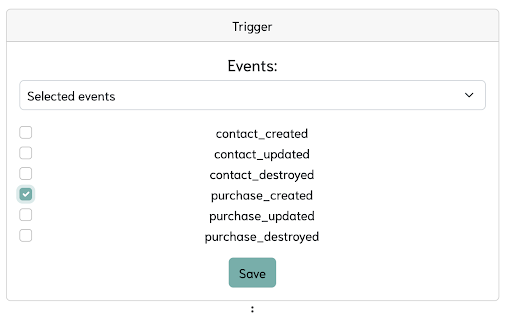
Remember to click on the Save button.
1.3 Add actions
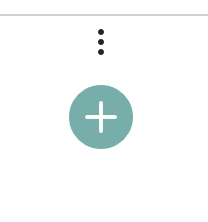
After you have selected the events, you can add an action by selecting the + sign below the trigger box.
Select an action from the Action Type dropdown list. We will discuss each of these actions individually in the following sections.
1.3.1 Add Contact
Select Add Contact from the list.
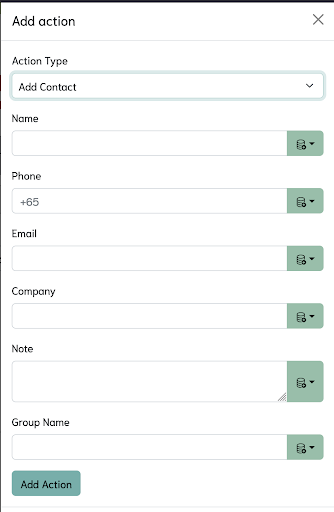
Fill in the form:
Name - The name of the contact. You can select the value from the data icon on the right.

Phone - The phone number of the contact. You can select the value from the data icon on the right.
Email - Email address of the contact. This field is optional. You can select the value from the data icon on the right, or leave it blank.
Company - Company where the contact is working at. This field is optional. You can select the value from the data icon on the right, or leave it blank.
Note - Any note about the contact. This field is optional. You can write any text, select the value from the data icon on the right, or leave it blank.
Group Name - The group name this contact belongs to. This field is optional. You can select a value from the data icon on the right, or leave it blank. If provided, WAContact will create a new contact group if there is no group with that name already.
1.3.2 Send Text
Select Send Text from the list.
Fill in the form:

Channel ID - The id of your channel. You can find the information by going to your Channel page in WAContact
To - The phone number of the contact. You can select the value from the data icon on the right.
Message - You can write any text here.
1.3.3 Schedule Send Text
Sometimes you may not want to send the message immediately. Maybe you want to send the message one hour after the triggered event. To do this, click on Add Delay checkbox

Delay Value - Enter a number indicating how long you want to delay the message. For example, let's say you want to send a message 2 hours after the event, then write 2 in the delay value, and select Hour from the dropdown menu.
1.3.4 Send Media
Select Send Media from the list.

Fill in the form:
Channel ID - The id of your channel. You can find the information by going to your Channel page in WAContact
To - The phone number of the contact. You can select the value from the data icon on the right.
MediaURL - URL to get media from. It can be a photo, audio or document.
Message - You can write any text here.
1.3.5 Schedule Send Media
Sometimes you may not want to send the message immediately. Maybe you want to send the message one hour after the triggered event. To do this, click on the Add Delay checkbox

Delay Value - Enter a number indicating how long you want to delay the message. For example, let's say you want to send a message 2 hours after the event, then write 2 in the delay value, and select Hour from the dropdown menu.
Step 2: Activate automation
Go back to the triggers list page by clicking on the ClickFunnels link in the breadcrumbs as shown below
Activate the trigger by clicking on the Activate button:

Step 3: Add a Webhook
3.1 Copy the trigger URL
Click on the URL on the trigger page to copy to value.
3.2 ClickFunnels Webhook Settings
-
Login to ClickFunnels.
-
Access the Funnels Page by hovering over the ClickFunnels drop-down menu from your dashboard and clicking on Funnels.

-
Choose the funnel you want to edit by clicking on the Funnel Name.

-
Click on the Settings tab.

-
Scroll down to Webhooks and click on the Manage Your Funnel Webhooks button to access the Funnel Webhooks Page

- Click on the + New Webhook button

- Paste the URL you copied from step 3.1
-
Select the Event(s) you want to trigger your Webhook from the Event drop-down menu. This event should be the same as the events you have selected from step 1.2
-
Select 1 from the Version drop-down menu.
-
Select attributes from the Adapter drop-down menu
- Click on the Create Funnel Webhook button
If you want to see whether your Webhook was delivered or not, you can click on the Deliveries button.
If you have any questions about this, please contact our support team. Login to WAContact. We have a chat button at the button right of the page.